
We’re fully into football season, so bring on the concession stand food.
And while I certainly won’t turn down a warm pretzel at a game, there’s something especially fun about making a batch at home. Golden brown on the outside, soft and chewy inside, brushed with butter, and ready for whatever you like to dip them in.
Put out some cheese sauce or mustard, turn on the game, and let everyone grab one while they’re warm. It doesn’t have to be complicated to make an ordinary afternoon feel a little more special.
These homemade soft pretzels are an afternoon baking project, with two steps that deserve a little extra attention: the uncovered refrigerator rest and the baking soda bath. Neither is difficult, and understanding what they do will help you bake with more confidence.
What makes a pretzel taste like a pretzel?
The dough gives us the chewy interior, but the bath does a lot of the work on the outside.
Baking soda is alkaline, meaning it has a pH above neutral. Dissolved in the bath water, it raises the pH of the dough’s surface. That encourages the Maillard reaction during baking: a series of reactions between sugars and amino acids that produces brown color and toasted flavors.
That’s why the bath matters. It helps create the browned crust and distinctive flavor we associate with pretzels. An egg wash adds shine, but it doesn’t replace this step.
Traditional pretzels often use a stronger alkaline bath made with food-grade lye. This recipe uses ordinary baking soda for an approachable home version. Expect a golden-to-deep-brown crust; the color won’t necessarily be as dark as a lye-dipped bakery pretzel.
The quick hot-water dip also starts setting the dough’s exterior. Keep it brief: more time in the bath doesn’t automatically mean a better pretzel, and an overly long dip can leave an unpleasant baking soda taste.
Don’t skip the fridge rest
After shaping, the pretzels go into the refrigerator uncovered for 45–60 minutes, before their baking soda bath.
This is a key step in this method. Chilling firms the dough, making the pretzels easier to lift and dip without stretching them out of shape. Leaving them uncovered lets the surface dry slightly and develop a thin skin, which also helps with handling.
Think of it as giving those twists a chance to settle into their shape before moving them into the water.
This short chill is mainly about handling and surface drying. It isn’t the same as an overnight cold fermentation used to develop flavor in some bread recipes.
A few things that help
Use bread flour. Its higher protein content helps build the structure for a satisfying chew.
Give stubborn dough a break. If your rope keeps shrinking, let it rest for 5–10 minutes, then return to rolling.
Keep the bath brief. Aim for 20–30 seconds total per pretzel.
Let excess water drain. A puddle beneath the dough can make it stick.
Bake for color. Look for a rich golden brown rather than pulling them out while they’re still pale.
Brush with butter after baking. It adds flavor and softens the crust slightly.
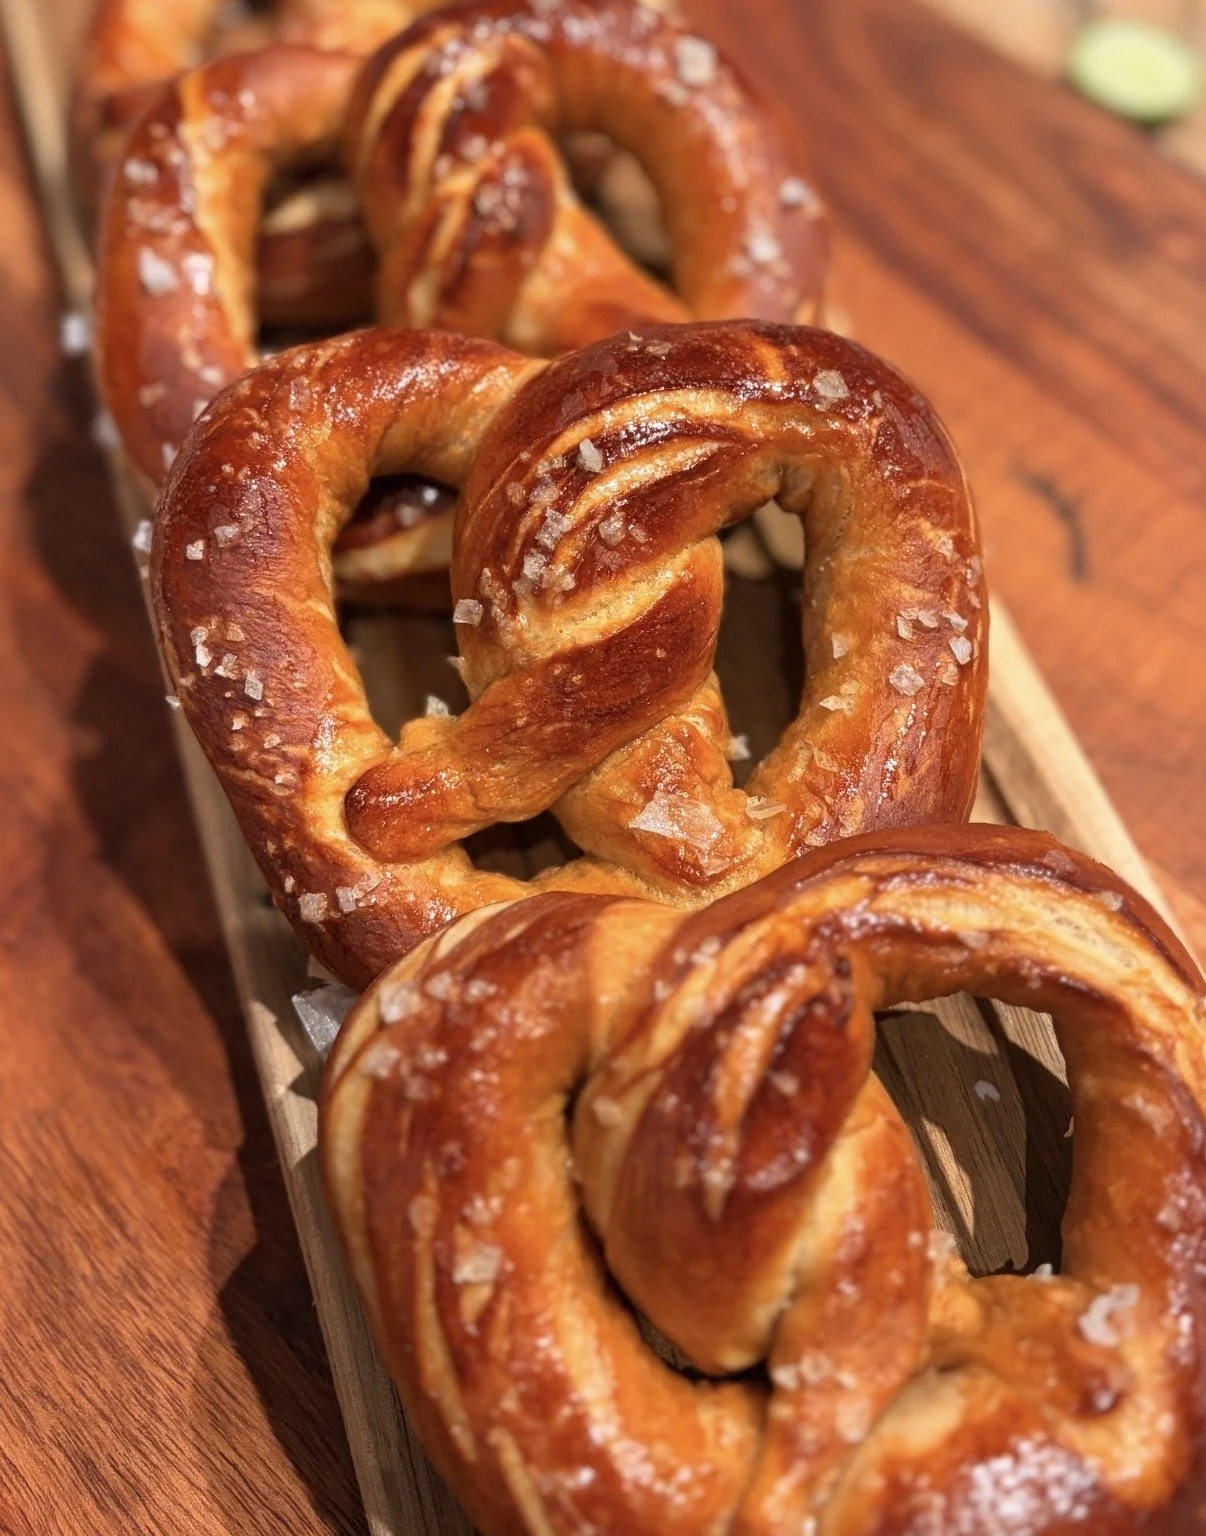
Homemade Soft Pretzels
Yield: 8 large pretzels
Active prep: About 35 minutes
Rise: 45–75 minutes
Dough rest: 10 minutes
Refrigerator rest: 45–60 minutes
Bake: 13–18 minutes
Total time: About 2½–3½ hours
Ingredients
For the dough
500 g bread flour, approximately 4 cups plus 2 tablespoons, spooned and leveled; weighing is preferred
10 g kosher salt; weigh it, since volume varies by brand
2¼ teaspoons instant yeast, one standard packet
270 g warm water, about 1 cup plus 2 tablespoons, around 100°F
1½ tablespoons barley malt syrup
2 tablespoons unsalted butter, softened
For the baking soda bath
9 cups water
½ cup baking soda
For finishing
1 egg white beaten with 1 tablespoon water
Pretzel salt or coarse salt, to taste
2 tablespoons butter, melted, for brushing after baking
Instructions
Combine the bread flour, salt, and instant yeast in the bowl of a stand mixer. Add the warm water, barley malt syrup, and softened butter. Mix with the dough hook on low until a dough forms.
Knead on low to medium-low for about 8–10 minutes, following your mixer’s guidance for bread dough, until smooth and elastic. The dough should feel firm and pliable. If a little dry flour remains, add water a teaspoon at a time, just until incorporated.
Place in a lightly greased bowl and cover. Let rise in a warm spot for 45–75 minutes, or until roughly doubled. Watch the dough more than the clock.
Gently deflate the dough and divide into eight equal pieces. Shape each into a short log, cover, and rest for 10 minutes. Each dough ball of mine weighed about 105 grams.
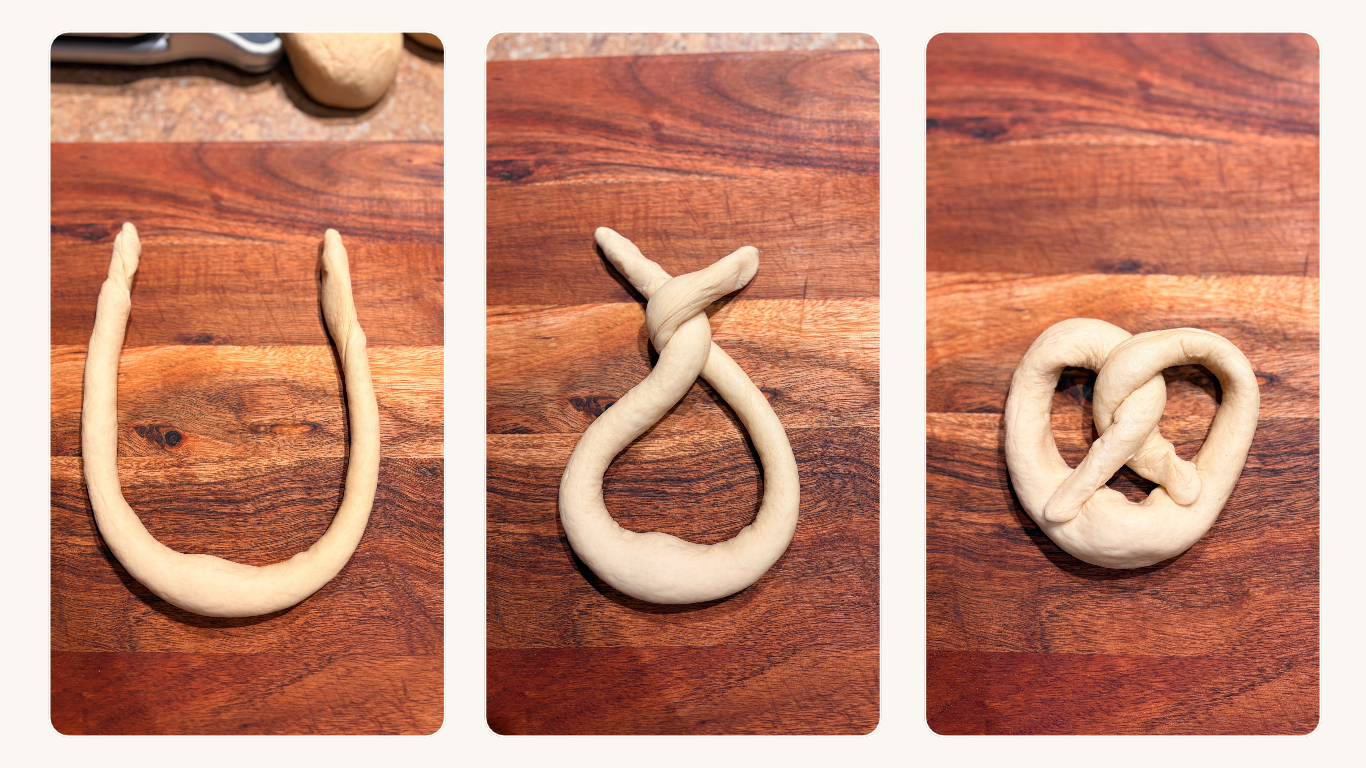
Roll each piece into a rope about 24–26 inches long, leaving the center slightly thicker if you like a fuller middle. Form a U, cross the ends, twist them once around each other, then fold them down onto the bottom of the U (see picture). Press the ends gently into the dough to secure. If the dough resists rolling, pause for another 5–10 minutes.
Arrange on two lined baking sheets with space between them. Use silicone baking mats or lightly greased parchment rated for 450°F. Refrigerate uncovered for 45–60 minutes, until the dough feels firmer and the surface is slightly dry.
Toward the end of chilling, preheat the oven to 450°F. In a large, wide stainless-steel pot, combine the water and baking soda. Bring to a boil, then adjust the heat to maintain a gentle boil. Leave plenty of room in the pot for bubbling.
Working with one or two pretzels at a time, gently lower the chilled pretzels into the bath for 20–30 seconds total, spooning water over the tops as needed. Lift out with a wide slotted spatula or spider, let excess water drain, and return to the prepared baking sheets.
Lightly brush with the egg-white wash and sprinkle with coarse salt. Bake for 13–18 minutes, until well browned and baked through. If baking both sheets together, rotate them and swap their positions partway through.
Brush the hot pretzels with melted butter. Let cool for a few minutes, then serve warm with your favorite dips.
Recipe notes
Barley malt syrup: Use the syrup listed here, rather than swapping in an equal amount of diastatic malt powder; they serve different roles.
Baking soda: This bath is written for regular baking soda straight from the box. Baked baking soda is more alkaline and should not be substituted using these same instructions.
Salt: A little coarse salt goes a long way. If you’re serving with a salty cheese dip, use a lighter sprinkle.
Cinnamon sugar: Omit the coarse salt. After baking, brush with melted butter and coat with cinnamon sugar.
Storing and reheating
These are best the day they’re baked, especially while still warm. Once completely cool, store airtight at room temperature for up to two days, or freeze for up to two months.
Reheat thawed pretzels in a 350°F oven for about 5–8 minutes, until warm. Surface salt can dissolve during storage and make the tops damp; if you’re baking specifically to freeze, consider leaving the salt off and adding it when reheating.
